Seasoning a Dutch oven is one of the most essential steps in maintaining its longevity and ensuring superior cooking performance. Whether you're a beginner or an experienced cook, understanding the seasoning process can significantly enhance your culinary experience. Properly seasoned Dutch ovens not only improve heat retention but also prevent food from sticking, making them a valuable tool in any kitchen.
There’s something truly satisfying about cooking with a well-seasoned Dutch oven. This versatile cookware has been used for centuries and continues to be a favorite among chefs and home cooks alike. The secret lies in the seasoning process, which creates a natural non-stick surface and enhances the flavor of your dishes.
In this guide, we’ll walk you through everything you need to know about seasoning a Dutch oven, from preparation to maintenance. By the end of this article, you’ll be equipped with the knowledge and skills to keep your Dutch oven in pristine condition for years to come.
Read also:Julian Ovenden Children A Comprehensive Look Into The Family Life Of The Renowned British Actor
Table of Contents
- Why Season a Dutch Oven?
- Preparation Before Seasoning
- Step-by-Step Guide to Seasoning a Dutch Oven
- Common Mistakes to Avoid
- Maintaining Your Seasoned Dutch Oven
- Troubleshooting Seasoning Issues
- Alternative Seasoning Methods
- Comparison Between Pre-Seasoned and Unseasoned Dutch Ovens
- Tips for Long-Lasting Seasoning
- Conclusion
Why Season a Dutch Oven?
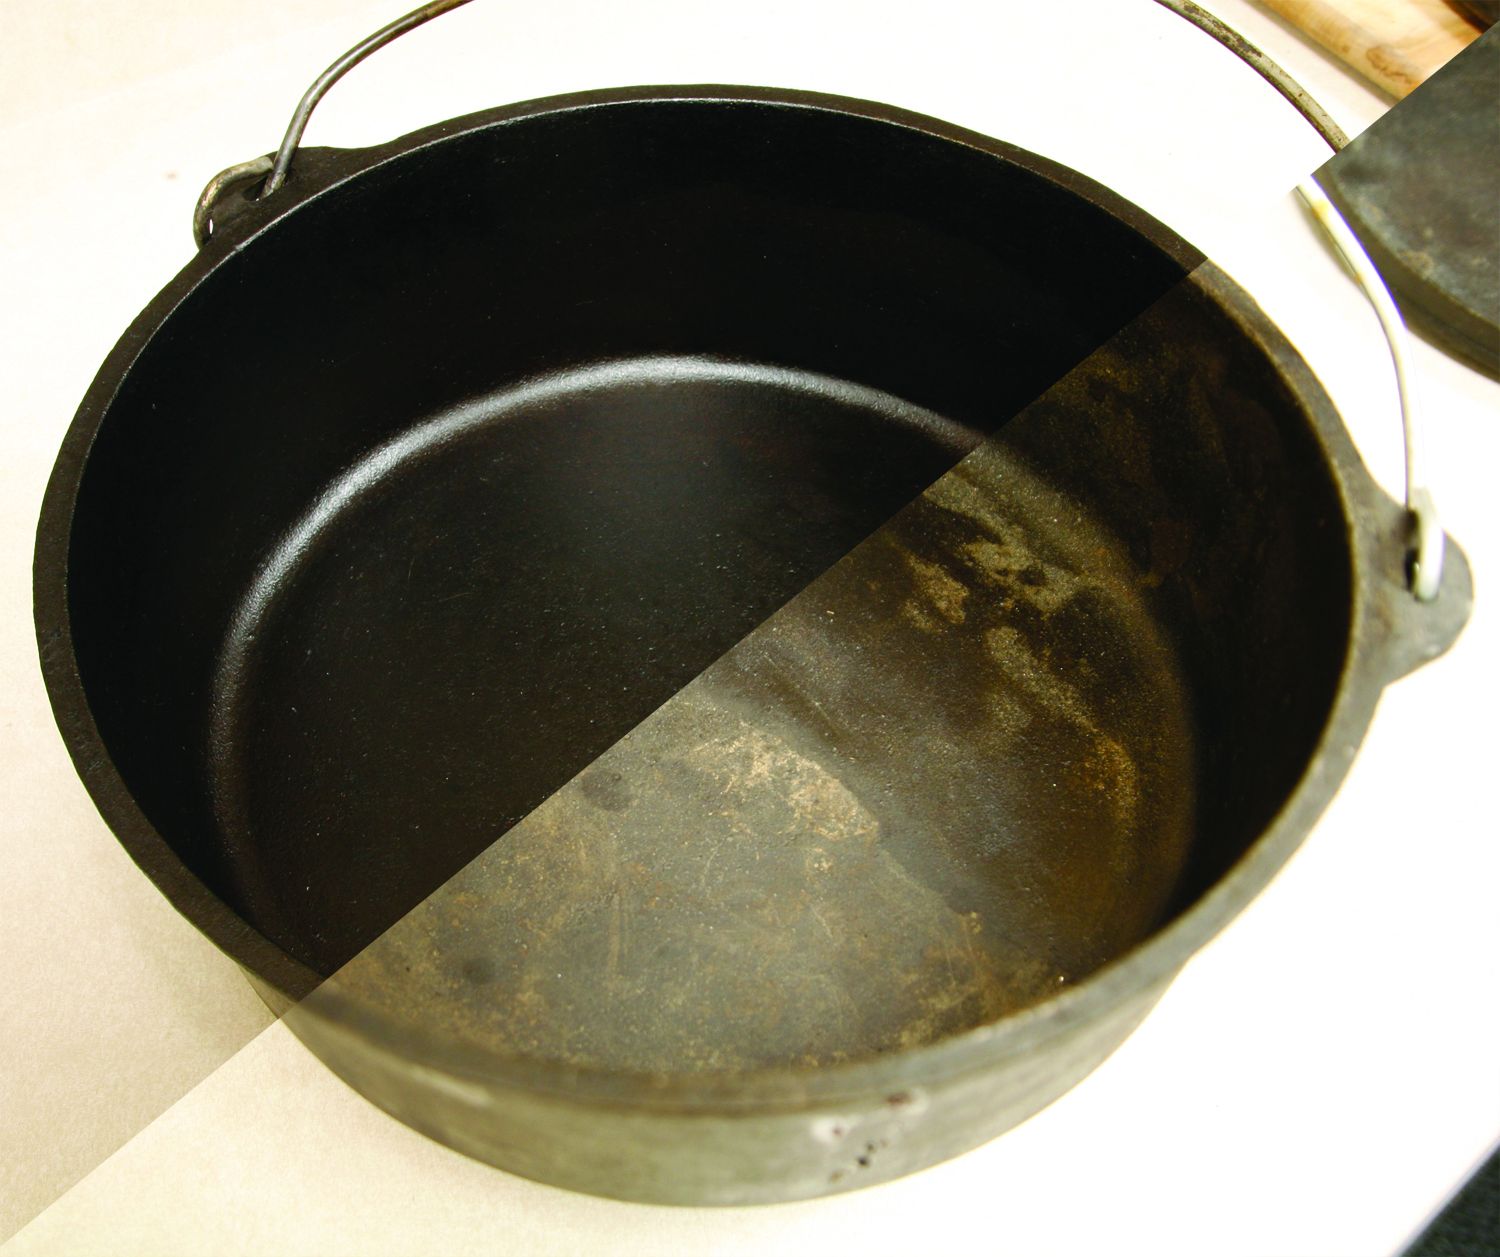
Seasoning a Dutch oven serves multiple purposes that go beyond just creating a non-stick surface. First and foremost, it protects the cast iron material from rust and corrosion. Cast iron is naturally porous, which means it can absorb moisture and eventually develop rust if not properly cared for. Seasoning fills these pores with a layer of oil, creating a protective barrier.
Additionally, seasoning improves the cooking experience by enhancing heat distribution and retention. A well-seasoned Dutch oven can maintain a consistent temperature, making it ideal for slow cooking, baking, and searing. It also imparts a subtle flavor to your dishes, adding depth and richness to your meals.
Preparation Before Seasoning
Understanding Your Dutch Oven
Before you start seasoning, it’s important to understand the material and structure of your Dutch oven. Most Dutch ovens are made from cast iron, which requires special care. Check for any pre-seasoning or coatings that may already be applied by the manufacturer.
Here’s what you need to do:
- Inspect the Dutch oven for any rust or damage.
- Wash the Dutch oven with warm water and mild soap to remove any residues.
- Dry it thoroughly with a clean towel and place it on a stovetop to ensure all moisture is evaporated.
Gathering Your Supplies
For effective seasoning, you’ll need the following materials:
- High-temperature cooking oil (such as flaxseed oil, vegetable oil, or coconut oil).
- A lint-free cloth or paper towels for applying the oil.
- An oven-safe rack or baking sheet for even heating.
- An oven thermometer to monitor temperature.
Step-by-Step Guide to Seasoning a Dutch Oven
Now that you’re prepared, let’s dive into the seasoning process. Follow these steps carefully to achieve a durable and long-lasting finish:
Read also:Pej Vahdat Age A Comprehensive Exploration Of The Life Career And Legacy
Step 1: Apply the Oil
Using a lint-free cloth, apply a thin, even layer of oil to the entire surface of the Dutch oven, including the lid and bottom. Be sure to cover all areas, paying extra attention to corners and edges.
Step 2: Heat the Dutch Oven
Place the Dutch oven upside down on the oven rack. This allows any excess oil to drip off and prevents pooling. Preheat your oven to 350°F (175°C) and bake the Dutch oven for one hour.
Step 3: Cool and Repeat
After baking, turn off the oven and let the Dutch oven cool completely inside. Once cooled, repeat the process 3-5 times for optimal results. Each layer builds upon the previous one, creating a strong and durable seasoning.
Common Mistakes to Avoid
While seasoning a Dutch oven is relatively straightforward, there are a few common mistakes that can affect the outcome:
- Using too much oil: Excess oil can lead to a sticky or gummy finish. Always use a thin layer.
- Skipping the cooling process: Cooling the Dutch oven properly ensures the oil bonds effectively with the surface.
- Not cleaning properly: Residues or debris can interfere with the seasoning process, so make sure the Dutch oven is clean before starting.
Maintaining Your Seasoned Dutch Oven
Proper maintenance is key to preserving the seasoning on your Dutch oven. Here are some tips to keep it in top condition:
- Wash with warm water only and avoid using soap unless absolutely necessary.
- Always dry the Dutch oven thoroughly after washing to prevent rust.
- Reapply a thin layer of oil after each use to maintain the seasoning.
Troubleshooting Seasoning Issues
Dealing with Rust
If you notice rust forming on your Dutch oven, don’t panic. Simply scrub it off with steel wool or a stiff brush, then reseason the affected areas following the steps outlined earlier.
Sticky Surface
A sticky surface usually indicates too much oil was used during seasoning. To fix this, heat the Dutch oven in the oven at 400°F (200°C) for an hour to burn off the excess oil. Once cooled, reapply a thin layer of oil and repeat the process.
Alternative Seasoning Methods
While the traditional oven method is widely used, there are alternative ways to season a Dutch oven:
- Stovetop Method: Heat the Dutch oven on a stovetop with a small amount of oil until it begins to smoke, then let it cool and repeat.
- Grill Method: Place the Dutch oven on a preheated grill and let it sit for 30 minutes, then cool and repeat the process.
Comparison Between Pre-Seasoned and Unseasoned Dutch Ovens
Many modern Dutch ovens come pre-seasoned, which can save time and effort. However, pre-seasoned ovens may not offer the same level of durability as those seasoned at home. Here’s a quick comparison:
| Aspect | Pre-Seasoned | Unseasoned |
|---|---|---|
| Initial Use | Ready to use out of the box | Requires seasoning before use |
| Durability | May wear off over time | Customized seasoning can last longer |
| Maintenance | Less maintenance required | Requires regular maintenance |
Tips for Long-Lasting Seasoning
Here are some additional tips to ensure your seasoning lasts:
- Store the Dutch oven in a dry place to prevent moisture buildup.
- Use it regularly to maintain the seasoning.
- Avoid cooking acidic foods like tomatoes or citrus for extended periods, as they can break down the seasoning.
Conclusion
Seasoning a Dutch oven is a crucial step in ensuring its longevity and performance. By following the steps outlined in this guide, you can create a durable, non-stick surface that enhances your cooking experience. Remember to maintain your Dutch oven properly and address any issues promptly to keep it in excellent condition.
We hope this comprehensive guide has provided you with the knowledge and confidence to season your Dutch oven effectively. If you have any questions or would like to share your experiences, feel free to leave a comment below. Don’t forget to explore our other articles for more tips and tricks on cooking and kitchen essentials!