Seasoning a dutch oven is an essential step in ensuring its durability and performance in the kitchen. Whether you're a seasoned cook or a beginner, mastering the art of seasoning will significantly enhance your cooking experience. Proper seasoning not only prevents food from sticking but also adds a natural non-stick surface to your cookware, making it easier to clean and maintain.
Seasoning dutch oven is not just about applying oil or grease to the surface. It's a meticulous process that requires patience, attention to detail, and adherence to specific steps. By following the right techniques, you can ensure that your dutch oven lasts for generations, maintaining its quality and functionality over time.
In this article, we'll delve into the intricacies of seasoning dutch oven, from preparation to maintenance. We'll also explore common mistakes to avoid and provide expert tips to help you achieve the best results. Let's embark on this culinary journey and elevate your cooking game with a well-seasoned dutch oven.
Read also:Gabby Eigenman The Rising Star Shaping The Future Of Tech And Entrepreneurship
Table of Contents
- Why Seasoning a Dutch Oven is Important
- Preparing Your Dutch Oven for Seasoning
- Choosing the Right Oil for Seasoning
- Step-by-Step Guide to Seasoning a Dutch Oven
- How to Reseason a Dutch Oven
- Expert Tips for Maintaining a Seasoned Dutch Oven
- Common Mistakes to Avoid
- Proper Storage of Your Dutch Oven
- Benefits of a Well-Seasoned Dutch Oven
- Conclusion
Why Seasoning a Dutch Oven is Important
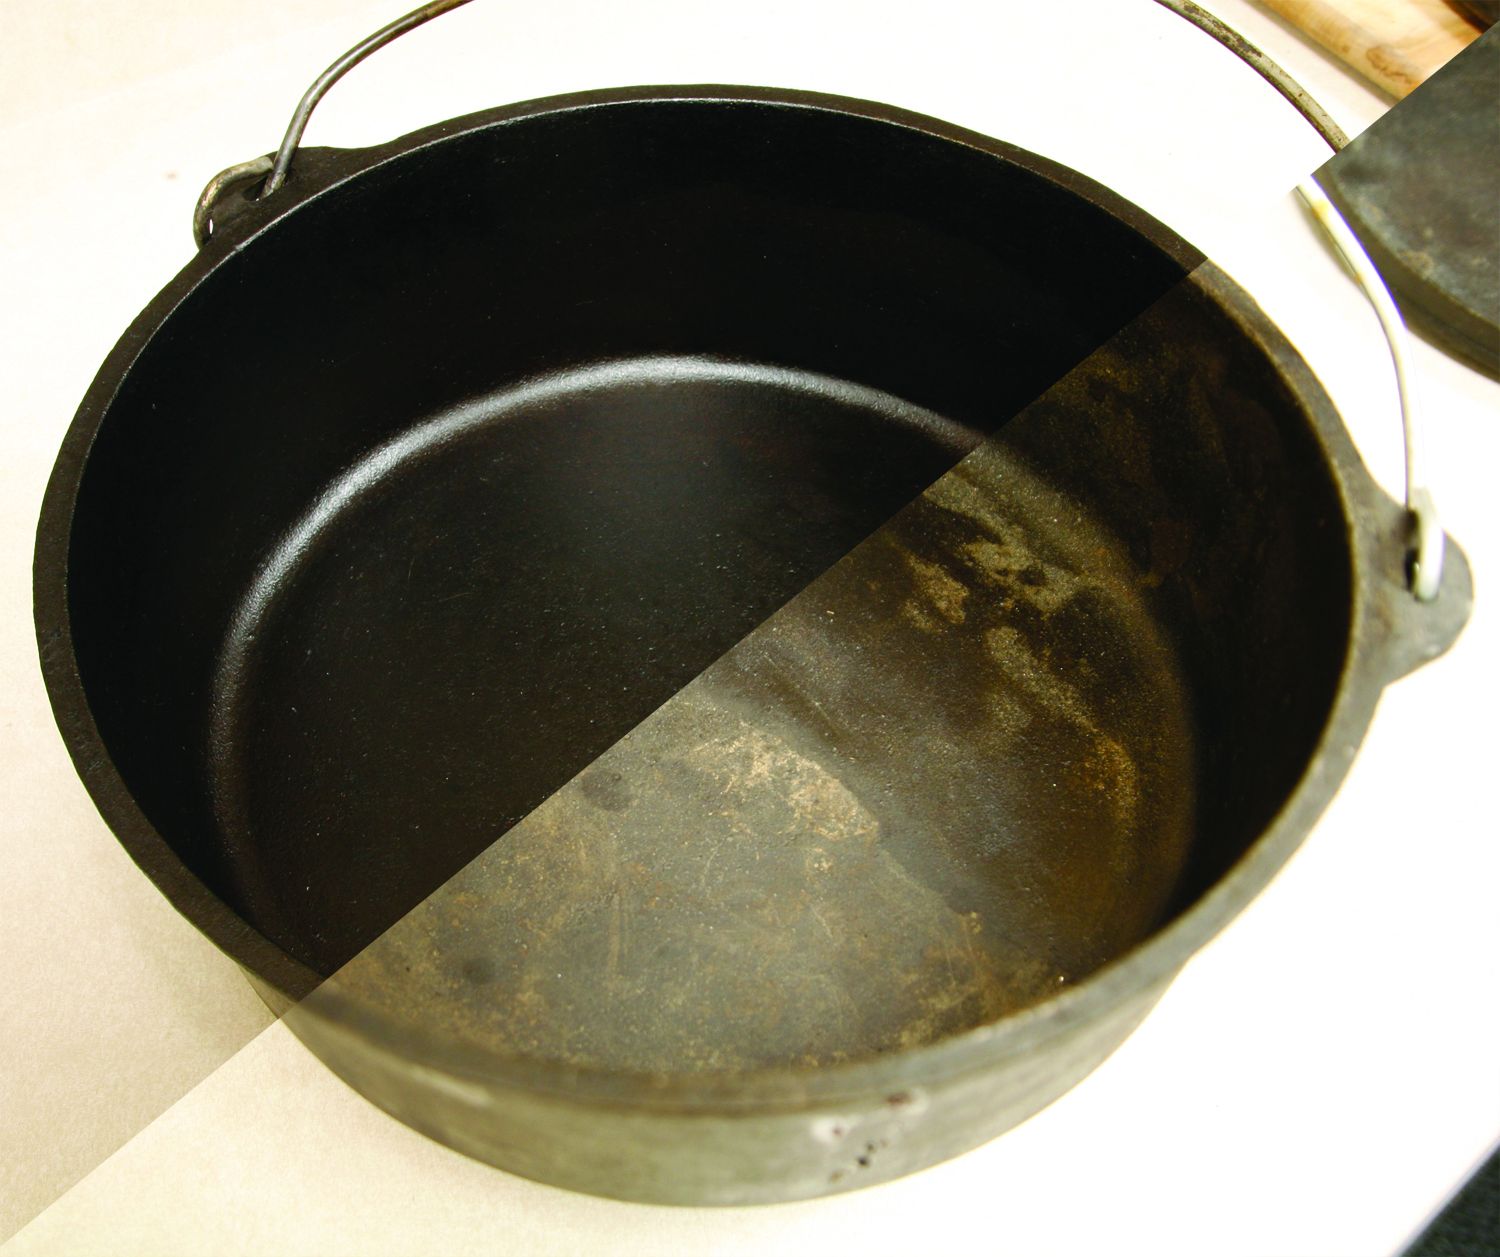
Seasoning a dutch oven is not merely an optional step but a fundamental process that ensures the longevity and functionality of your cookware. When you season a dutch oven, you create a natural non-stick surface that prevents food from sticking, making cooking and cleaning easier. Moreover, seasoning protects the metal from rust and corrosion, extending the life of your dutch oven.
Proper seasoning also enhances the flavor of your food. The oil used in the seasoning process bonds with the metal, creating a layer that imparts a rich, earthy flavor to your dishes. This is especially beneficial when cooking hearty meals like stews, soups, and roasts, which are staples for dutch oven cooking.
Preparing Your Dutch Oven for Seasoning
Before you start seasoning your dutch oven, it's crucial to prepare it properly. This involves cleaning the oven thoroughly to remove any manufacturing residues or contaminants that may affect the seasoning process. Use warm water and a mild detergent to scrub the surface gently, ensuring all residues are removed.
After cleaning, dry the dutch oven completely. Any moisture left on the surface can interfere with the seasoning process, leading to an uneven or ineffective layer. You can dry it with a clean cloth or place it in a warm oven for a few minutes to ensure all moisture is evaporated.
Choosing the Right Oil for Seasoning
Selecting the appropriate oil is critical for successful seasoning. Oils with a high smoke point, such as flaxseed oil, grapeseed oil, or vegetable oil, are ideal for seasoning dutch ovens. These oils polymerize when heated, forming a hard, durable layer on the metal surface.
Flaxseed oil is often recommended by experts due to its excellent polymerization properties. However, it can be expensive and may have a strong odor. If you prefer a more affordable and less odorous option, vegetable oil or grapeseed oil are excellent alternatives.
Read also:Vernon Maxwell Net Worth Unveiling The Wealth And Legacy Of A Nba Legend
Step-by-Step Guide to Seasoning a Dutch Oven
Cleaning the Dutch Oven
Begin by cleaning your dutch oven with warm water and a mild detergent. Scrub the surface gently to remove any dirt or residues. Rinse it thoroughly and dry it completely using a clean cloth or by placing it in a warm oven.
Applying Oil to the Surface
Once your dutch oven is clean and dry, apply a thin, even layer of your chosen oil to the entire surface, including the lid and handle. Use a lint-free cloth or paper towel to spread the oil evenly, ensuring no excess oil remains on the surface.
Baking the Dutch Oven
Preheat your oven to 350°F (175°C) and place the dutch oven upside down on the middle rack. Place a sheet of aluminum foil or a baking sheet on the rack below to catch any drips. Bake the dutch oven for one hour, then turn off the oven and let it cool completely inside.
How to Reseason a Dutch Oven
Over time, the seasoning on your dutch oven may wear off due to frequent use or improper cleaning. When this happens, it's essential to reseason your dutch oven to restore its non-stick surface and protect it from rust. Reseasoning follows the same steps as initial seasoning but may require fewer coats depending on the condition of the existing layer.
Start by cleaning the dutch oven thoroughly, then apply a thin layer of oil and bake it as described earlier. Repeat the process if necessary until you achieve a smooth, even layer of seasoning.
Expert Tips for Maintaining a Seasoned Dutch Oven
- Avoid using abrasive cleaners or steel wool, as they can damage the seasoning layer.
- Hand wash your dutch oven with warm water and a mild detergent to preserve the seasoning.
- Dry your dutch oven immediately after washing to prevent rust formation.
- Apply a light coat of oil to the surface after each use to maintain the seasoning.
Common Mistakes to Avoid
One common mistake when seasoning a dutch oven is applying too much oil. Excess oil can lead to a sticky, uneven layer that doesn't polymerize properly. Always apply a thin, even layer of oil to ensure the best results.
Another mistake is not allowing the dutch oven to cool completely inside the oven after baking. Cooling it too quickly can cause thermal shock, leading to cracks or damage to the seasoning layer.
Proper Storage of Your Dutch Oven
Storing your dutch oven correctly is vital for maintaining its seasoning and preventing rust. Keep it in a dry, well-ventilated area to avoid moisture buildup. You can place a paper towel or cloth inside the oven to absorb any residual moisture and prevent the lid from sticking.
If you're storing your dutch oven for an extended period, apply a light coat of oil to the surface to protect it from rust and dust.
Benefits of a Well-Seasoned Dutch Oven
A well-seasoned dutch oven offers numerous benefits, from improved cooking performance to enhanced durability. The natural non-stick surface makes cooking and cleaning easier, while the protective layer prevents rust and corrosion, extending the life of your cookware.
Additionally, a seasoned dutch oven imparts a rich, earthy flavor to your dishes, elevating the taste of your meals. Whether you're cooking a simple stew or a complex recipe, a well-seasoned dutch oven ensures consistent and delicious results.
Conclusion
Seasoning a dutch oven is a crucial process that enhances its functionality, durability, and performance in the kitchen. By following the steps outlined in this article and adhering to expert tips, you can achieve a well-seasoned dutch oven that will serve you for years to come.
We encourage you to share your seasoning experiences in the comments below and explore other articles on our site for more culinary insights. Happy cooking!